What is selenium?
Selenium is a widely used test automation framework. There are 3 selenium tools; Selenium RC, Selenium IDE and Selenium Webdriver, out of which the Selenium Webdriver is the most commonly used industry tool. Using the Selenium Wedriver the test cases can be automated with C#. To learn more about selenium, follow the link below: https://www.seleniumhq.org/docs/01_introducing_selenium.jsp#introducing-seleniumEnvironment Setup
First, the Visual Studio IDE needs to be installed on to the PC. Next the Selenium Webdriver for C# must be downloaded .
Follow the link below:
https://www.seleniumhq.org/download/
Example
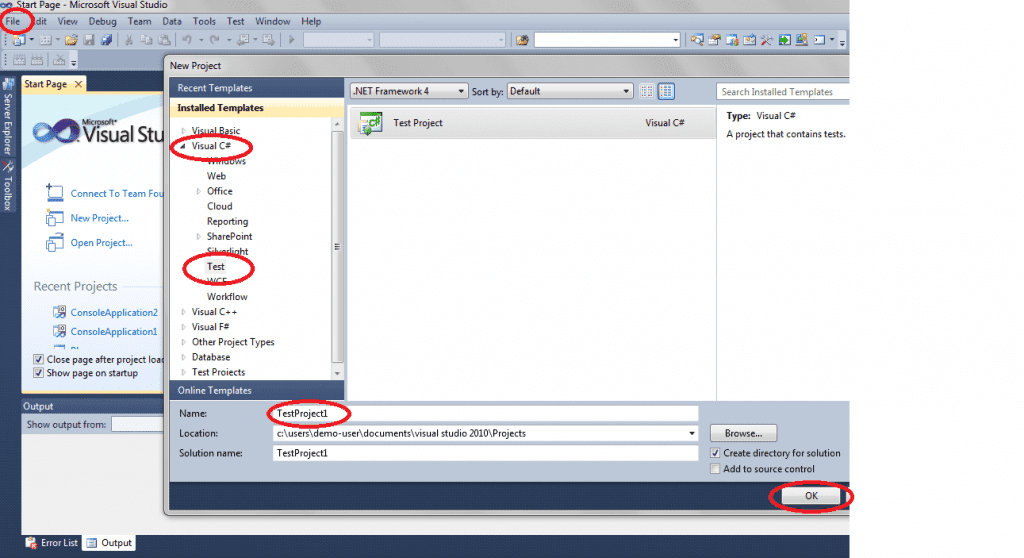
Step 1: Create a new project through Microsoft Visual Studio
Open Visual Studio and go on to the File tab and click on New Project.

Step 2: Add Selenium to the project
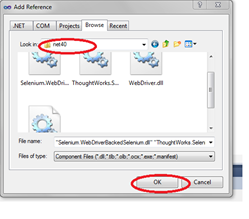
Right click on Project Name in Solution, click on Explore and add reference. Then select all DLL files and follow the steps in the image below.
Step 3

Ensure the following code is used for the required resources in the test.
using System;
using System.Text;
using System.Collections.Generic;
using System.Linq;
using OpenQA.Selenium;
using OpenQA.Selenium.Firefox;
using OpenQA.Selenium.Support.UI;
using Microsoft.VisualStudio.TestTools.UnitTesting;
Step 4
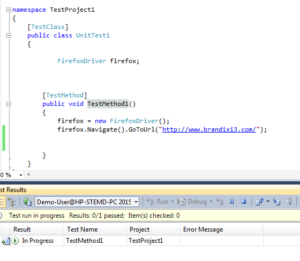
The test can then be written inside the test method, and the test can be run. For example, the following test will direct you to the brandixi3 website.

Click here to download our Software Testing brochure for more information
Click here to read more about Brandix i3’s Software Testing and QA Solution
Author:
Thimali Wijayathilake
Subscribe to our blog to know all the things we do


